Build Assets for individual developer
Build Assets
The modern tool used for generating all our official assets is the Github Actions build-asset workflow on the hpcc-systems/HPCC-Platform repository, located here. Developers and contributors can utilize this same workflow on their own forked repository. This allows developers to quickly create assets for testing changes and test for errors before the peer review process.
Build assets will generate every available project under the HPCC-Platform namespace. There currently is not an option to control which packages in the build matrix get generated. But most packages get built in parallel, and released after the individual matrix job is completed, so there is no waiting on packages you don't need. Exceptions to this are for packages that require other builds to complete, such as the ECLIDE.
Upon completion of each step and matrix job in the workflow, the assets will be output to the repositories tags tab. An example for the hpcc-systems user repository is hpcc-systems/HPCC-Platform/tags.

Dependent variables
The build assets workflow requires several repository secrets be available on a developers machine in order to run properly. You can access these secrets and variables by going to the settings tab in your forked repository, and then clicking on the Secrets and Variables - Actions drop down under Security on the lefthand side of the settings screen.
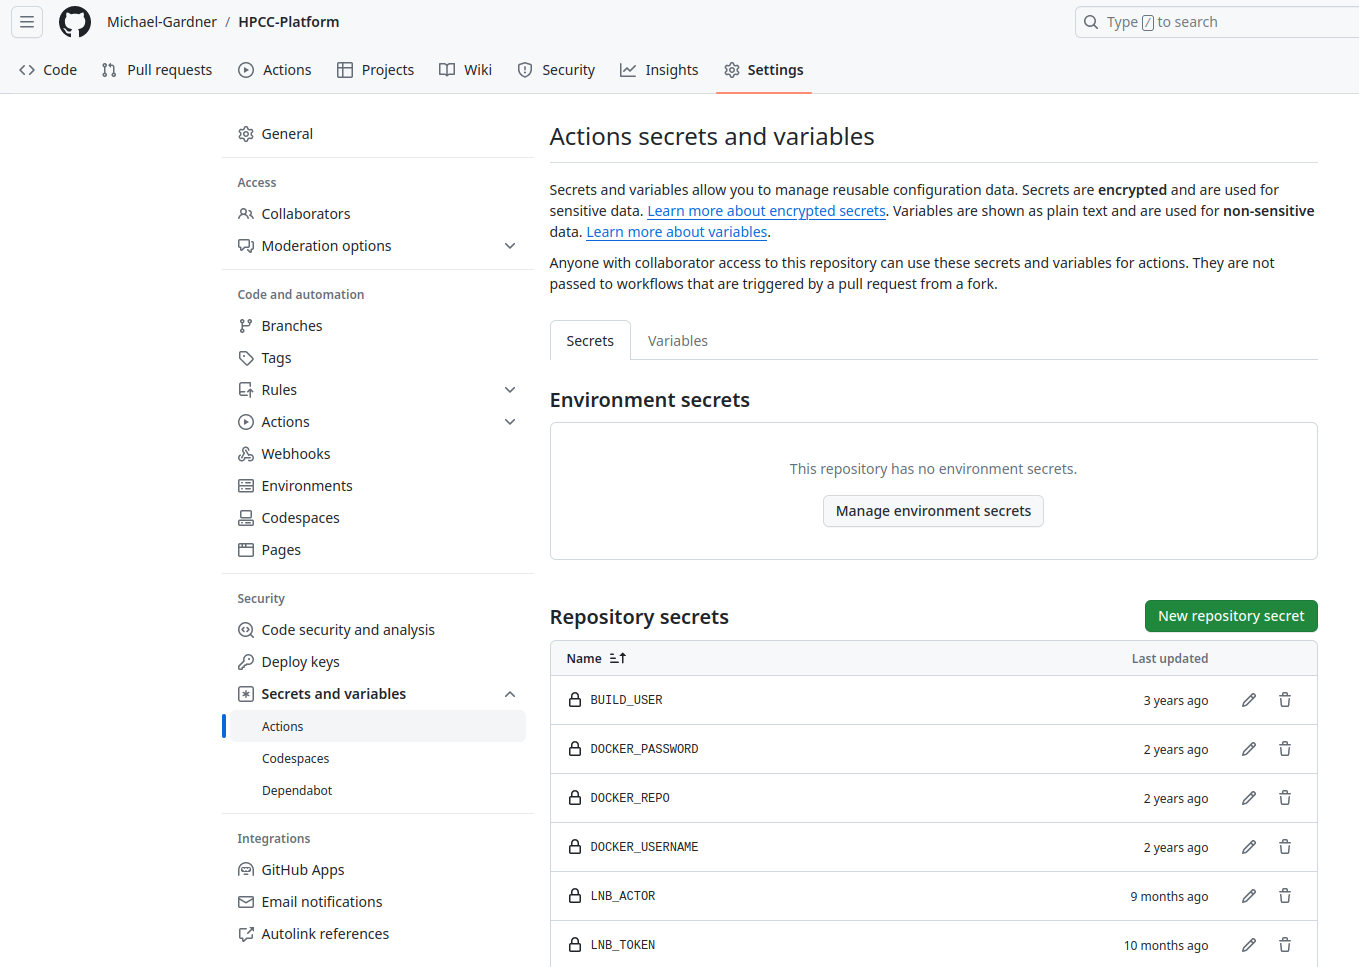
Create a secret by clicking the green New Repository Secret button. The following secrets are needed;
- LNB_ACTOR - Your Github username
- LNB_TOKEN - Classic Github token for your user with LN repo access
- DOCKER_USERNAME - Your docker.io username
- DOCKER_PASSWORD - Your docker.io password
- SIGNING_CERTIFICATE - pks12 self signed cert encoded to base64 for windows signing
- SIGNING_CERTIFICATE_PASSPHRASE - passphrase for pks12 cert
- SIGNING_SECRET - ssh-keygen private key for signing linux builds
- SIGN_MODULES_KEYID - email used to generate key
- SIGN_MODULES_PASSPHRASE - passphrase for private key
Generating the windows signing certificate
To generate the self signed certificate for windows packages, you will need to do the following steps.
- Generate a root certificate authority
openssl req -x509 -sha256 -days 365 -nodes -newkey rsa:2048 -subj "/CN=example.com/C=US/L=Boca Raton" -keyout rootCA.key -out rootCA.crt
- Create the server secret key
openssl genrsa -out server.key 2048
- generate a csr.conf file
cat > csr.conf <<EOF
[ req ]
default_bits = 2048
prompt = no
default_md = sha256
req_extensions = req_ext
distinguished_name = dn

[ dn ]
C = US
ST = Florida
L = Boca Raton
O = LexisNexis Risk
OU = HPCCSystems Development
CN = example.com

[ req_ext ]
subjectAltName = @alt_names

[ alt_names ]
DNS.1 = example.com
IP.1 = 127.0.0.1

EOF- Generate Cert Signing Request
openssl req -new -key server.key -out server.csr -config csr.conf
- Create cert.conf file
cat > cert.conf <<EOF

authorityKeyIdentifier=keyid,issuer
basicConstraints=CA:FALSE
keyUsage = digitalSignature, nonRepudiation, keyEncipherment, dataEncipherment
subjectAltName = @alt_names

[ alt_names ]
DNS.1 = example.com

EOF- Generate SSL cert with self signed CA
openssl x509 -req -in server.csr -CA rootCA.crt -CAkey rootCA.key -CAcreateserial -out server.crt -days 365 -sha256 -extfile cert.conf
- Use server.crt to generate PKCS12 needed for windows tools
openssl pkcs12 -inkey server.key -in server.crt -export -name "hpcc_sign_cert" -out hpcc_sign_cert.pfx
You will be asked to "enter export password", this will be what goes in the variable SIGNING_CERTIFICATE_PASSPHRASE in Github Actions.
- Convert to base64
On linux: base64 hpcc_sign_cert.pfx > hpcc_sign_cert.base64
On MacOS: base64 -i hpcc_sign_cert.pfx -o hpcc_sign_cert.base64
From here you can cat the output of hpcc_sign_cert.base64 and copy the output into the variable SIGNING_CERTIFICATE in Github Actions.
Generating a signing key for linux builds
For linux builds we're going to generate a private key using GnuPG (gpg).
Start the process by entering a terminal and run the command;gpg --full-generate-key
You will be given several options in this process.
For type of key, select RSA and RSA default.
For keysize, enter 4096.
For expiration date, select 0 = key does not expire.
Input your real name.
Input your company email address.
For comment, input something like Github actions key for signing linux builds.
Then it will ask you to enter a passphrase for the key, and confirm the passphrase. Do not leave this blank.
A key should be output and entered into your gpg keychain. Now we need to export the key for use in the github actions secret.
To extract your key run gpg --output private.pgp --armor --export-secret-key <email-address-used>.
Now open private.pgp, copy all, and go to github actions secrets. Paste the output into the secret "SIGNING_SECRET"
Starting a build
The build-asset workflow is kicked off by a tag being pushed to the developers HPCC-Platform repository. Before we push the tag to our HPCC-Platform repository, we will want to have other tags in place if we want LN and ECLIDE builds to function correctly. Suggested tag patterns are community_HPCC-12345-rc1 or HPCC-12345-rc1.
If you choose not to tag the LN and ECLIDE builds, the community builds will generate but errors will be thrown for any build utilizing the LN repository. ECLIDE will not even attempt a build unless you are also successfully building LN due to the dependency scheme we use. The 'Baremetal' builds are designed to generate our clienttools targets for windows-2022 and macos-12 distributions. These jobs contain both the COMMUNITY and LN builds. If the LN build is not tagged, the COMMUNITY section of the job will run, and the assets will be uploaded, but the job will fail when it tries to build LN.
If you choose to precede your Jira number with community_ then you must tag LN with internal_ and ECLIDE with eclide_. Otherwise just use the Jira tag in all three repositories.
Once the LN and ECLIDE repository tags have been created and pushed with the same base branch that your work is based on for the HPCC-Platform, then you are free to push the HPCC-Platform tag which will initiate the build process.
The summary of the build-asset workflow can then be viewed for progress, and individual jobs can be selected to check build outputs. 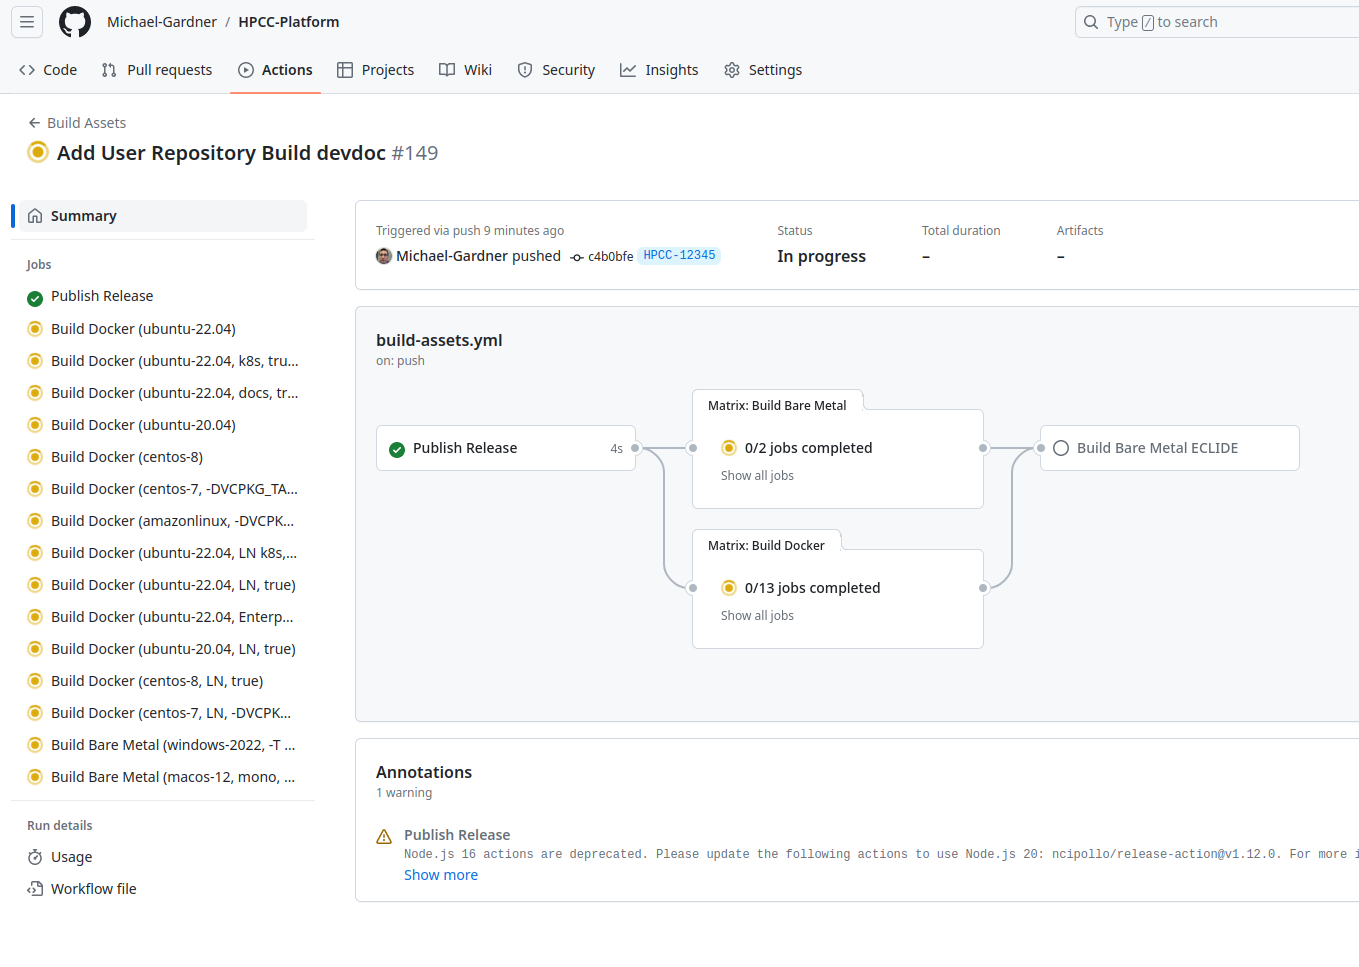
Asset output
Assets from the workflow will be released into the corresponding tag location, either in the HPCC-Platform repository for all community based builds, or the LN repository for any builds containing proprietary plugins. Simply browse to the releases or tag tab of your repository and select the tag name you just built. The assets will show up there as the build completes. An example of this on the hpcc-systems repository is hpcc-systems/HPCC-Platform/releases.